SDK quickstart
This page provides a step-by-step guide on seamlessly integrating the Video SDK and effortlessly building a basic, real-time interactive app from scratch using minimal code.
Understand the tech
This section shows you how to integrate Interactive Live Streaming features into your app. Following are some basic concepts about real-time audio and video interaction:
- Video SDK: An SDK developed by Agora to enable developers to add real-time audio and video interaction to their projects.
- Channel: A channel is used to transmit data. Users in the same channel can interact in real time.
- Host: A host can publish audio and video in a channel. The host can also subscribe to audio and video published by other hosts.
- Audience: A user assigned the audience role may subscribe to audio and video within the channel. However, they are not authorized to publish audio or video content.
For more information, see Core Concepts.
The following figure shows the basic workflow you implement to integrate this feature into your app.

In a Interactive Live Streaming event, hosts stream a video feed to an audience. For example, when a CEO is giving a speech to the company employees, the CEO does not need to see all members of the audience. To represent this in your app, when you join as a host, the local feed is started and you see your own video feed. When you join as a member of the audience, you see the host's video feed.
To start a session, implement the following steps in your app:
- Set the channel profile and role.
-
Retrieve a token: A token is a computer-generated string that authenticates a user when your app joins a channel. In this guide, you retrieve your token from Agora Console. To see how to create an authentication server for development purposes, see Secure authentication with tokens.
-
Join a channel: Call methods to create and join a channel; apps that pass the same channel name join the same channel.
- Host publishes local video and audio to the channel: A live streaming event has one or more hosts. Each host can publish their local video to the channel.
- Audience subscribes to video and audio published by the hosts: Audience members view content published by hosts to the channel.
Prerequisites
- Android Studio 4.2 or higher.
- Android SDK API Level 21 or higher.
- Two mobile devices running Android 5.0 or higher.
- A computer with Internet access. If a firewall is deployed in your network environment, refer to Connect through restricted networks with Cloud Proxy to use Agora services normally.
- A camera and a microphone
- A valid Agora account and project
-
The following information from Agora Console:
-
App ID: A unique string generated by Agora that identifies your project.
-
A temporary token: A dynamic key that authenticates a user when the client joins a channel. Note down the channel name you use to generate the token.
informationThe maximum validity period of a temporary token is 24 hours.
Please refer to Agora account management for details.
-
Set up your project
This section shows you how to set up a new Android project and integrate the Agora Video SDK.
Create a project
-
Create a new project (Optional)
- Open Android Studio and select File > New > New Project....
- Select Phone and Tablet > Empty Activity and click Next.
- Set the project name and storage path.
- Select the language as Java, and click Finish to create the Android project.
NoteAfter you create a project, Android Studio automatically starts gradle sync. Ensure that the synchronization is successful before proceeding to the next step. -
Add network and device permissions
Open the
/app/src/main/AndroidManifest.xmlfile and add the following permissions after</application>: -
Prevent code obfuscation
Open the
/app/proguard-rules.profile and add the following lines to prevent the Video SDK code from being obfuscated:
Integrate the SDK
Choose either of the following methods to integrate Video SDK into your project.
- Maven Central
- Manual integration
-
Open the
settings.gradlefile in the project's root directory and add the Maven Central dependency, if it doesn't already exist:NoteIf your Android project uses dependencyResolutionManagement, the method of adding the Maven Central dependency may differ.
-
Open the
/app/build.gradlefile and add the Video SDK underdependencies. Check the latest version of the SDK from the release notes and replacex.y.zwith the specific version number.Obtain the latest version number from the release notes.
-
Download the latest version of Video SDK from the the SDKs page and unzip it.
-
Open the unzipped file and copy the following files or subfolders to your project path.
File or folder Project path agora-rtc-sdk.jarfile/app/libs/arm64-v8afolder/app/src/main/jniLibs/armeabi-v7afolder/app/src/main/jniLibs/x86folder/app/src/main/jniLibs/x86_64folder/app/src/main/jniLibs/high_level_apiinincludefolder/app/src/main/jniLibs/ -
Select the file
/app/libs/agora-rtc-sdk.jarin the left navigation bar of Android Studio project files, right-click, and select add as a library from the drop-down menu.
Create a user interface
Set up two FrameLayout elements in your project to display local and remote video streams. Use the following code to generate the essential user interface. Paste the code into the /app/src/main/res/layout/activity_main.xml file, replacing the existing content.
Sample code to create the user interface
<?xml version="1.0" encoding="utf-8"?><androidx.constraintlayout.widget.ConstraintLayout xmlns:android="http://schemas.android.com/apk/res/android" xmlns:app="http://schemas.android.com/apk/res-auto" xmlns:tools="http://schemas.android.com/tools" android:layout_width="match_parent" android:layout_height="match_parent" tools:context=".MainActivity"> <TextView android:layout_width="wrap_content" android:layout_height="wrap_content" android:text="Start Video Call!" app:layout_constraintBottom_toBottomOf="parent" app:layout_constraintLeft_toLeftOf="parent" app:layout_constraintRight_toRightOf="parent" app:layout_constraintTop_toTopOf="parent" /> <FrameLayout android:id="@+id/local_video_view_container" android:layout_width="match_parent" android:layout_height="match_parent" android:background="@android:color/white" /> <FrameLayout android:id="@+id/remote_video_view_container" android:layout_width="160dp" android:layout_height="160dp" android:layout_alignParentEnd="true" android:layout_alignParentRight="true" android:layout_alignParentTop="true" android:layout_marginEnd="16dp" android:layout_marginRight="16dp" android:layout_marginTop="16dp" android:background="@android:color/darker_gray" tools:ignore="MissingConstraints" /></androidx.constraintlayout.widget.ConstraintLayout>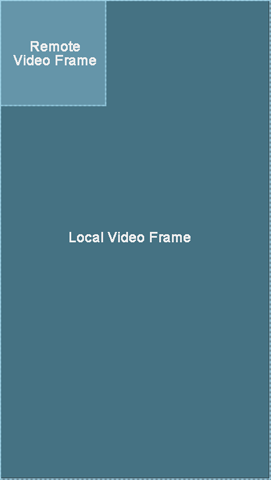
Implement Interactive Live Streaming
This section guides you through the implementation of basic real-time audio and video interaction in your app.
The following figure illustrates the essential steps:

A complete code sample that implements the basic process of real-time interaction is presented here for your reference. Copy the sample code into your project to quickly implement the basic functions of real-time interaction.
To use the sample code, copy the following lines into the /app/src/main/java/com/example/<projectname>/MainActivity.java file and replace <projectname> in package com.example.<projectname> with the name of your project.
Complete sample code for real-time Interactive Live Streaming
import android.Manifest;import android.content.pm.PackageManager;import android.os.Bundle;import android.view.SurfaceView;import android.widget.FrameLayout;import android.widget.Toast;import androidx.annotation.NonNull;import androidx.appcompat.app.AppCompatActivity;import androidx.core.app.ActivityCompat;import androidx.core.content.ContextCompat;import io.agora.rtc2.ChannelMediaOptions;import io.agora.rtc2.Constants;import io.agora.rtc2.IRtcEngineEventHandler;import io.agora.rtc2.RtcEngine;import io.agora.rtc2.RtcEngineConfig;import io.agora.rtc2.video.VideoCanvas;public class MainActivity extends AppCompatActivity { // Fill in the app ID from Agora Console private String appId = "<Your app ID>"; // Fill in the channel name private String channelName = "<Your channel name>"; // Fill in the temporary token generated from Agora Console private String token = "<Your token>"; private RtcEngine mRtcEngine; private final IRtcEngineEventHandler mRtcEventHandler = new IRtcEngineEventHandler() { // Callback when successfully joining the channel @Override public void onJoinChannelSuccess(String channel, int uid, int elapsed) { super.onJoinChannelSuccess(channel, uid, elapsed); runOnUiThread(() -> { Toast.makeText(MainActivity.this, "Join channel success", Toast.LENGTH_SHORT).show(); }); } // Callback when a remote user or host joins the current channel @Override public void onUserJoined(int uid, int elapsed) { runOnUiThread(() -> { // When a remote user joins the channel, display the remote video stream for the specified uid setupRemoteVideo(uid); }); } // Callback when a remote user or host leaves the current channel @Override public void onUserOffline(int uid, int reason) { super.onUserOffline(uid, reason); runOnUiThread(() -> { Toast.makeText(MainActivity.this, "User offline: " + uid, Toast.LENGTH_SHORT).show(); }); } }; private void initializeAndJoinChannel() { try { // Create an RtcEngineConfig instance and configure it RtcEngineConfig config = new RtcEngineConfig(); config.mContext = getBaseContext(); config.mAppId = appId; config.mEventHandler = mRtcEventHandler; // Create and initialize an RtcEngine instance mRtcEngine = RtcEngine.create(config); } catch (Exception e) { throw new RuntimeException("Check the error."); } // Enable the video module mRtcEngine.enableVideo(); // Enable local preview mRtcEngine.startPreview(); // Create a SurfaceView object and make it a child object of FrameLayout FrameLayout container = findViewById(R.id.local_video_view_container); SurfaceView surfaceView = new SurfaceView (getBaseContext()); container.addView(surfaceView); // Pass the SurfaceView object to the SDK and set the local view mRtcEngine.setupLocalVideo(new VideoCanvas(surfaceView, VideoCanvas.RENDER_MODE_FIT, 0)); // Create an instance of ChannelMediaOptions and configure it ChannelMediaOptions options = new ChannelMediaOptions(); // Set the user role to BROADCASTER or AUDIENCE according to the scenario options.clientRoleType = Constants.CLIENT_ROLE_BROADCASTER; // In the live broadcast scenario, set the channel profile to BROADCASTING (live broadcast scenario) options.channelProfile = Constants.CHANNEL_PROFILE_LIVE_BROADCASTING; // Set the audience latency level options.audienceLatencyLevel = Constants.AUDIENCE_LATENCY_LEVEL_ULTRA_LOW_LATENCY; // Use the temporary token to join the channel // Specify the user ID yourself and ensure it is unique within the channel mRtcEngine.joinChannel(token, channelName, 0, options); } private void setupRemoteVideo(int uid) { FrameLayout container = findViewById(R.id.remote_video_view_container); SurfaceView surfaceView = new SurfaceView (getBaseContext()); surfaceView.setZOrderMediaOverlay(true); container.addView(surfaceView); // Pass the SurfaceView object to the SDK and set the remote view mRtcEngine.setupRemoteVideo(new VideoCanvas(surfaceView, VideoCanvas.RENDER_MODE_FIT, uid)); } private static final int PERMISSION_REQ_ID = 22; // Obtain recording, camera and other permissions required to implement real-time audio and video interaction private String[] getRequiredPermissions(){ // Determine the permissions required when targetSDKVersion is 31 or above if (android.os.Build.VERSION.SDK_INT >= android.os.Build.VERSION_CODES.S) { return new String[]{ Manifest.permission.RECORD_AUDIO, // Recording permission Manifest.permission.CAMERA, // Camera permission Manifest.permission.READ_PHONE_STATE, // Permission to read phone status Manifest.permission.BLUETOOTH_CONNECT // Bluetooth connection permission }; } else { return new String[]{ Manifest.permission.RECORD_AUDIO, Manifest.permission.CAMERA }; } } private boolean checkPermissions() { for (String permission : getRequiredPermissions()) { int permissionCheck = ContextCompat.checkSelfPermission(this, permission); if (permissionCheck != PackageManager.PERMISSION_GRANTED) { return false; } } return true; } // System permission request callback @Override public void onRequestPermissionsResult(int requestCode, @NonNull String[] permissions, @NonNull int[] grantResults) { super.onRequestPermissionsResult(requestCode, permissions, grantResults); if (checkPermissions()) { initializeAndJoinChannel(); } } @Override protected void onCreate(Bundle savedInstanceState) { super.onCreate(savedInstanceState); setContentView(R.layout.activity_main); // If authorized, initialize RtcEngine and join the channel if (checkPermissions()) { initializeAndJoinChannel(); } else { ActivityCompat.requestPermissions(this, getRequiredPermissions(), PERMISSION_REQ_ID); } } @Override protected void onDestroy() { super.onDestroy(); // Stop local video preview mRtcEngine.stopPreview(); // Leave the channel mRtcEngine.leaveChannel(); }}appId and token variables, replace the placeholders with the values you obtained from Agora Console. Ensure you enter the same channelName you used when generating the temporary token.Follow the implementation steps to understand the core API calls in the sample code.
Handle permissions
This section describes how to import Android classes and obtain the camera, recording, and other permissions of Android devices.
-
Import Android classes
-
Get Android permissions
When launching the app, check that the required permissions for real-time interaction have been granted in the app.
Import Agora classes
Import the relevant Agora classes and interfaces:
Declare variables
Pass in the app ID and the temporary token obtained from Agora Console. Use the channel name you filled in when generating the temporary token. You use these values to initialize the engine and join a channel.
Initialize the engine
Call create to initialize an RtcEngine instance.
Before initializing the SDK, ensure that the user fully understands and agrees to the relevant privacy policy.
Enable the video module
Follow these steps to enable the video module:
- Call
enableVideoto enable the video module. - Call
startPreviewto enable local video preview. - Call
setupLocalVideoto initialize the local view and set the local video display properties.
Join a channel and publish audio and video streams
Instantiate and configure ChannelMediaOptions and call joinChannel to join a channel. In ChannelMediaOptions, set the channel profile to BROADCASTING (live broadcast scene) and set the user role to BROADCASTER (host) or AUDIENCE (audience).
Set up remote video
When a remote user joins the channel, call setupRemoteVideo and pass in the remote user's uid, obtained from the onUserJoined callback, to display the remote video.
Start and close the app
When a user launches your app, start real-time interaction. When a user closes the app, stop the interaction.
-
In the
onCreatecallback, check whether the app has obtained the required permissions. If the permissions have not been granted, request the required permissions from the user. If permissions have been granted, initializeRtcEngineand join a channel.
- When a user closes the app, or switches the app to the background, call
stopPreviewto stop the video preview and then callleaveChannelto leave the current channel and release all session-related resources.
Test the sample code
Take the following steps to test the sample code:
-
Enable developer options on your Android test device. Turn on USB debugging, connect the Android device to your development machine through a USB cable, and check that your device appears in the Android device options.
-
In Android Studio, click
 Sync Project with Gradle Files to resolve project dependencies and update the configuration.
 -
After synchronization is successful, click
 Run app. Android Studio starts compilation. After a few moments, the app is installed on your Android device.
- Launch the App, grant recording and camera permissions. If you set the user role to host, you will see yourself in the local view.
- On a second Android device, repeat the previous steps to install and launch the app. Test the following scenarios:
- If users on both devices join the channel as hosts, they can see and hear each other.
- If one user joins as host and the other as audience, the host can see themselves in the local video window; the audience can see the host in the remote video window and hear the host.
Reference
This section contains content that completes the information on this page, or points you to documentation that explains other aspects to this product.
Next steps
After implementing the quickstart sample, read the following documents to learn more:
- To ensure communication security in a test or production environment, best practice is to obtain and use a token from an authentication server. For details, see Secure authentication with tokens.
Sample project
Agora provides open source sample projects on GitHub for your reference. Download or view the JoinChannelVideo project for a more detailed example.
API reference
-
RtcEngineConfig -
create -
ChannelMediaOptions -
joinChannel -
enableVideo -
startPreview -
leaveChannel -
IRtcEngineEventHandler