ActiveFence Video Content Moderation
ActiveFence is the leader in providing Trust & Safety solutions to protect online platforms and their users from malicious behavior and content. By integrating ActiveFence capabilities in your app, you can design the exact content moderation solution you need. Content moderation is powered by ActiveFence AI-driven automated detection for text, audio, image, and video content that enables you to moderate, enforce policies, manage user flags, and send notifications across multiple abuse areas and languages.
The following figure shows the ActiveFence workflow to moderate content sent by a specific user to a channel:

This page shows you how to integrate and use the ActiveFence content detection and moderation extension in your app.
Prerequisites
The development environment requirements are as follows:
- Android Studio 4.1 or higher.
- Android SDK API Level 24 or higher.
- A mobile device that runs Android 4.1 or higher.
- Implemented SDK quickstart for Video Calling.
- If you use the RTC SDK token, ensure that you're using AccessToken2 to enable the ActiveFence video content moderation extension. See Upgrade AccessToken2.
Project Setup
In order to configure ActiveFence:
-
Setup your ActiveFence account
-
Either:
- In Agora Extensions Marketplace, select ActiveFence, then click Activate Your Account.
- Contact extensions.marketplace@agora.io to activate the extension.
ActiveFence sends you an email with activation details.
-
Open the ActiveFence email and follow the instructions to activate your ActiveFence account.
During this process, you open ActiveOS in your browser.
-
-
Configure your ActiveFence API Key
You use ActiveFence API keys for authentication when you send images to the ActiveFence content moderation API.
-
In ActiveOS, click the Settings icon on the top-right.
Account Settings opens.
-
Click Data Management > ActiveFence API Keys, then click Add Key.
-
In Add API Key, add your Key Name and Description, then click Generate Key.
-
Click Your API Key and save it to a secure place.
This key appears only once.
-
Email Agora this key information. Agora uses this key to share data using ActiveFence API.
-
-
Connect your app to your ActiveFence account
In order for ActiveFence to monitor data streamed to a channel in your app, ActiveFence needs to bind your App ID to your ActiveFence account. To do this:
-
Send Agora an email at support@agora.io requesting ActiveFence activation with your:
- Company name
- Company email
- Agora APP-ID,
- ActiveFence API Key
-
Agora activates communication between your app and ActiveFence and supplies any extra credentials to you.
-
ActiveFence communicates any extra credentials to you.
-
-
Customize your callback fields
ActiveFence allows you to add custom fields for your callbacks. Take the following steps to add custom callback fields:
-
In ActiveOS, open Account Settings by clicking the Settings icon on the top-right.
-
Click Moderation Capabilities > Custom Fields.
-
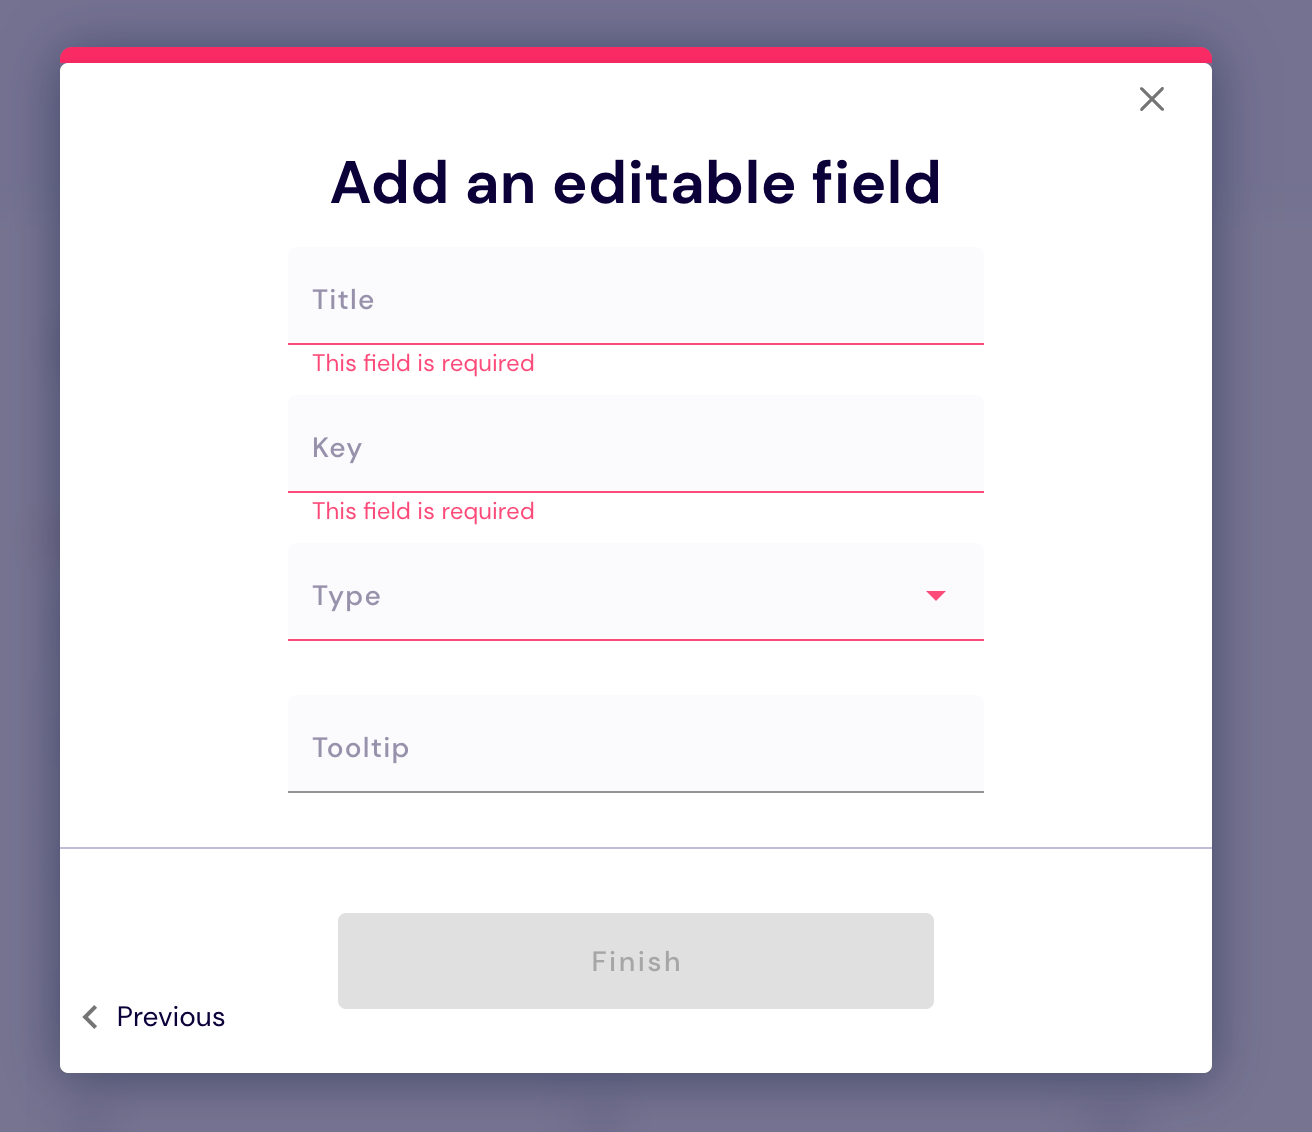
Press Add Field and choose EDITABLE to open an Add an editable field window.
-
Repeat the step multiple times to add the following fields:
Title & Key Type Meaning cname Text RTC channel name requestId Text Request Id of the screenshot sid Text Session Id source Text Source of screenshot (agora) timestamp Number Timestamp, For example, 20230614050206430 uid Number User id (unique in a channel)
See ActiveFence docs for more information about custom fields.
-
-
Configure Action webhooks
-
In ActiveOS, click Data Management > Webhook Key Management, then click Add Key.
-
In Add API Key, fill in the form and click Generate Key.
You use this key to authenticate calls to your webhook. If do not use authentication, you do not need this key.
-
In ActiveOS, click DATA MANAGEMENT > Action Webhooks, then click Add Webhook.
-
In Add Action Webhook, update the following fields and click Save.
- Action - The name for this webhook.
- Related Entity - Set to
content. - Endpoint URL - The FQDM for your webhook. For example:
https://my.super.duper/webhook. - Request Method - Set to POST.
- API Key - For authenticated requests to your webhook. Choose the key you configured earlier. If you do not require authentication, set to No auth.
-
In Body, configure the format of the JSON object and data sent to your webhook. For example:
-
-
Configure the trigger for your webhook
ActiveFence monitors the data sent in a channel. When content matches conditions in a workflow, ActiveFence sends a PUSH request to your webhook with information about the channel, the data sent and the user who sent it.
-
Create an Action
- In ActiveOS, click the Settings icon on the top-right.
- Click Moderation Capabilities > Action Management, then click Add Action
- In Choose Action Type, click Enforce, then click Next
- Fill Action Name, then Choose Webhook.
Whenever a workflow or a moderator triggers the Action, the webhook is activated.
-
Configure automated workflows
Rule-based workflows in ActiveOS are triggered by any data point, and start any Action you created. To add a new workflow.
-
In ActiveOS, click the hamburger menu at the top left, click Workflows.
-
Click Create New and follow the UI to set the:
- Initiator - the subset of data applicable for this workflow. For example, Abusive or Harmful. In the parameter picker on the right side menu, choose a Violation Type.
- Condition - further rules routing data according to different criteria. For example, Risk Score equals 90.
- Action - the result of the workflow for any item that matches its conditions. For example, suspent. This is a system action or a webhook.
Workflows are only active after you enable them.
-
-
-
Invite users and start moderating with ActiveFence
-
In ActiveOS, click the Settings icon on the top-right.
-
Click Users > Account Users.
-
Click Add user and invite team members who should have access to your account.
To start moderating on ActiveOS and unlock more value for moderation teams, email support@activefence.com or send an intercom messenger in ActiveOS.
-
Integrate the extension
Now that ActiveFence is activated, to check content sent in the channels in your app:
-
Setup your webhook
In order to react to calls made by ActiveFence for moderated content, your need to create a server that received and interprets the data sent to you in the webhook you defined in ActiveFence . For example:
- In your browser, open agora-activefence-kicker and use the one-click deployment for the server
- Add the deployment link +
/kick/to the webhook URL for the desired event in ActiveOS .
-
Initialize
ContentInspectConfigSet up the inspect config inside
ContentInspectModule. If you use a string UID to join the channel and want to receive it in the webhook callback, pass the string UID toYourExtraInfoinsideContentInspectConfig.For example, the following config monitors the images in a video feed, taking one frame every 5 seconds:
-
Apply
ContentInspectConfigto your Agora Engine instance.Enable content inspect after joining a channel and after the local video is published and played. If you need support taking screenshots for multiple video streams and uploading them, use the
enableContentInspectExmethod. -
Catch banning events
To know when your local user is banned from the scene, use the
connectionStateChangedTodelegate method:This only happen if you have applied the
Kicking Serversteps above, or created your own kicking server that communicates with ActiveFence.
Reference
- ActiveFence docs
- Channel Management REST API
- You find complete documentation for ActiveOS in your environment: https://<my ActiveFence app>. activefence.com/ts-platform/documentation.